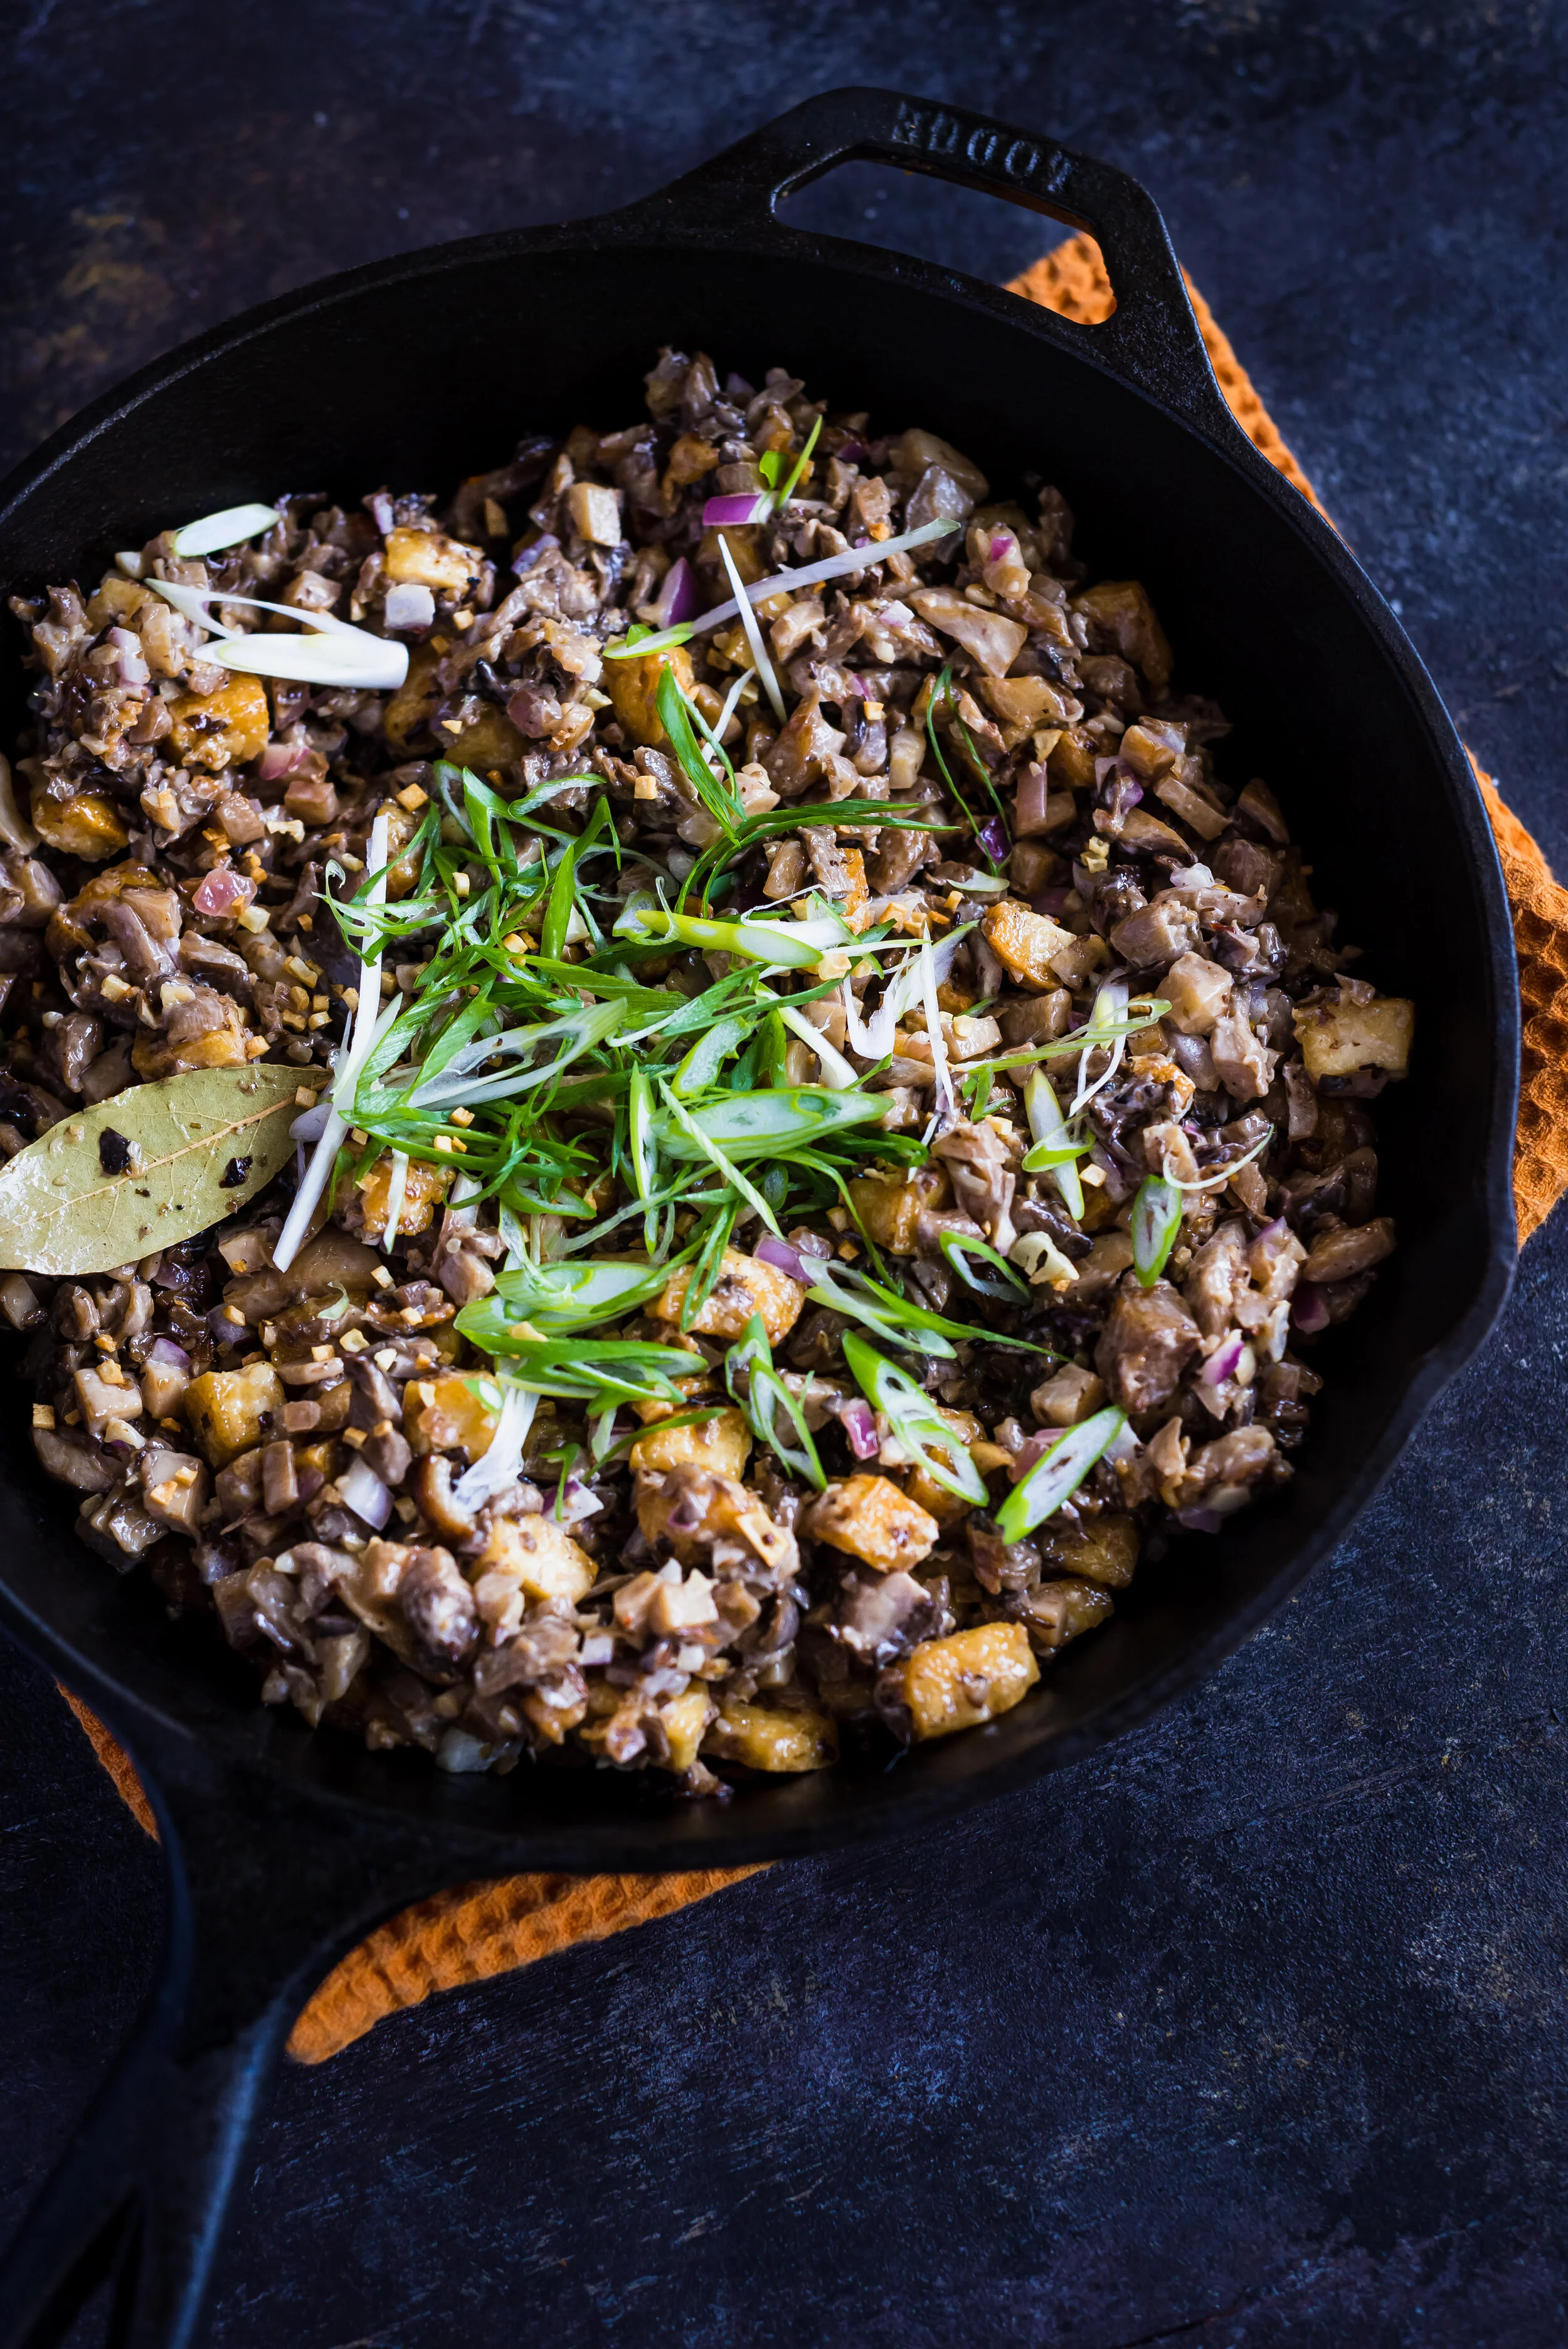
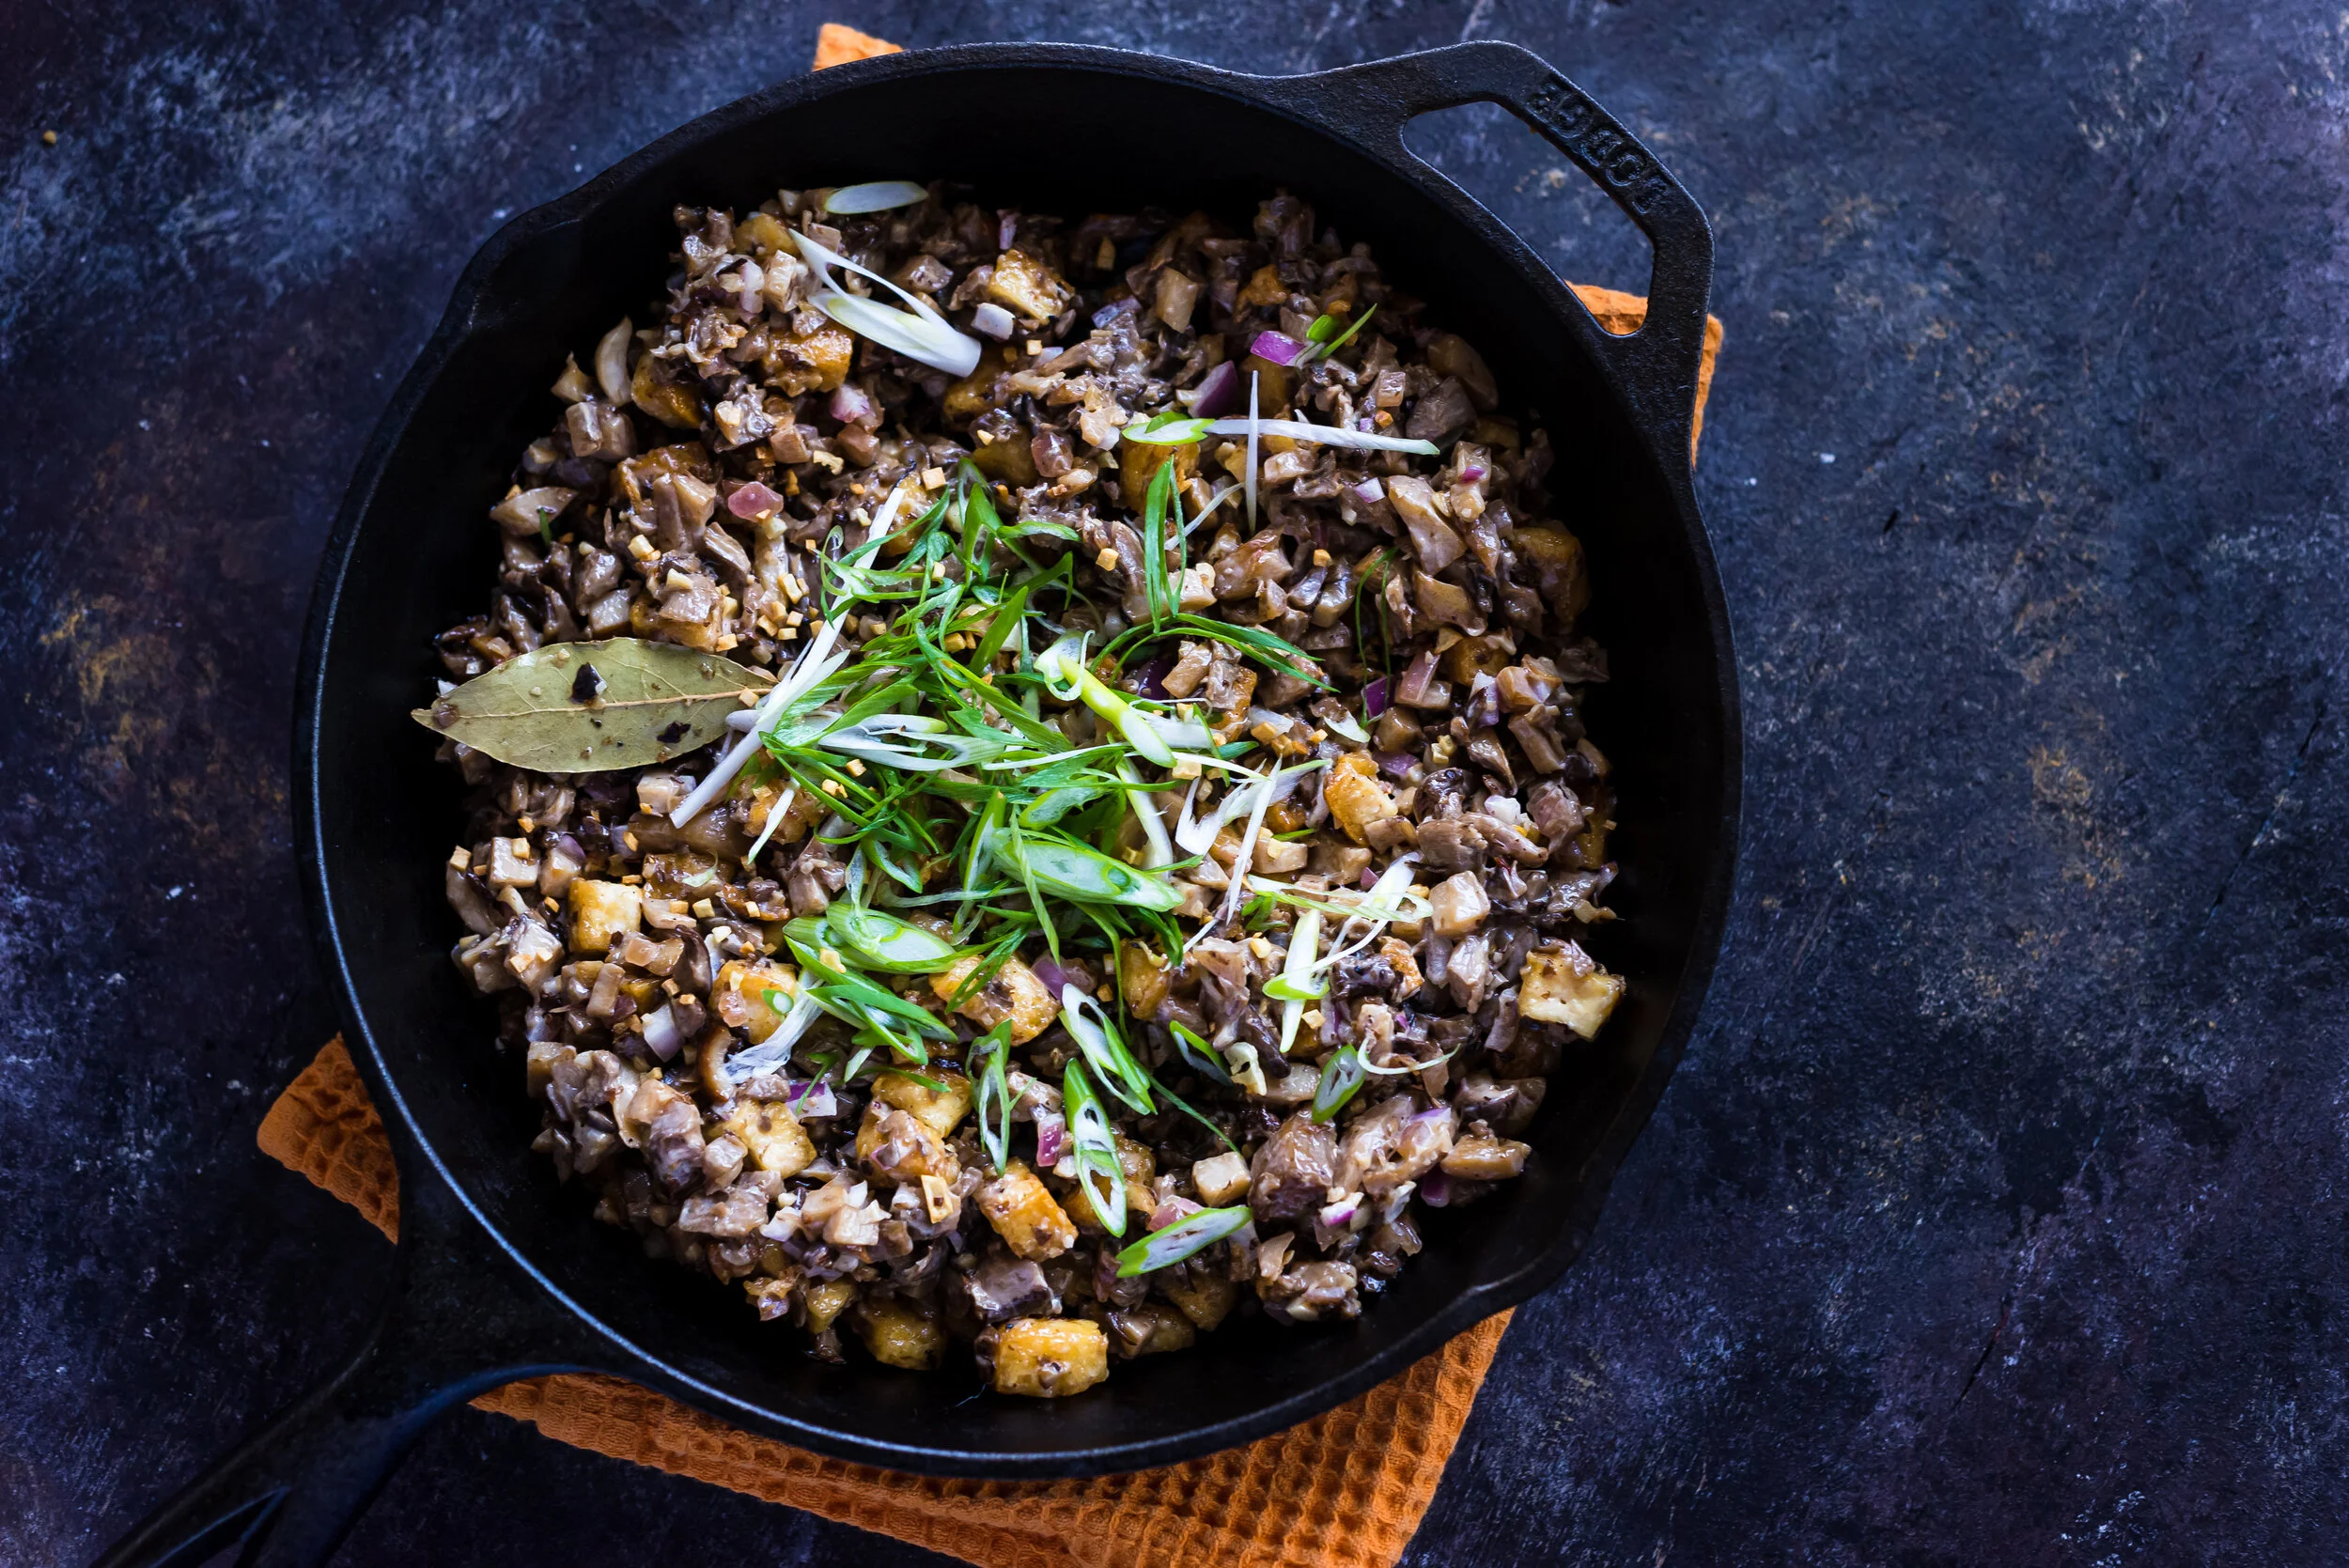
Recipe & Resources: Oyster Mushroom & Crispy Tofu Sisig
Thank you for taking class with me during UCI FilAm Alumni Chapter’s Wellness Week! Please see the oyster mushroom and crispy tofu sisig recipe and class resources here.
Ingredients (Serving 4-6):
10oz Firm Tofu, pressed and cubed to bite-sized pieces
16oz Oyster Mushrooms, chopped to bite-sized pieces
2 Bay Leaves
Pinch of Chili Flakes
3oz Red Onion, medium dice
1tbsp Ginger, peeled and grated
6 Garlic Cloves, minced
4tsp Calamansi Juice
3tbsp Soy Sauce, preferably Datu Puti or UFC
4 heaping tbsp Mayonnaise
Kosher Salt, preferably Diamond Crystal
Fresh Cracked Black Pepper
Garlic Oil
Splash of Water
Toppings:
1 Scallion Stalk, sliced thinly on bias
Fried Minced Garlic
Instructions:
Press firm tofu by lining a sheet tray with doubled-over paper towels. Lay the tofu on the tray and cover with another layer of doubled-over paper towels. Place a cutting board, or another flat surface, on top and weigh down the tofu using books or cans. 15-30 minutes to squeeze out excess moisture is fine.
This ensures that the tofu will not easily break apart while cooking and can brown more easily when frying.
Cube into bite-sized pieces once time is complete.
Coat a preheated, 12-inch pan with a light film of garlic oil. On medium to medium-high heat, add the cubed tofu and toss until sides are evenly golden brown.
You can make garlic oil at home by placing peeled cloves of garlic in a saucepan and adding neutral-flavored oil until garlic can be fully submerged. Bring up the temperature of your oil until small bubbles surround the cloves of garlic. Simmer until cloves are fork tender or golden and caramelized (up to you) and remove them from the pan. Cool the garlic oil and store in the fridge for further use.
Remove the tofu from the pan and drain on paper towels. Lightly salt the fried tofu as they are still hot.
Add your chopped oyster mushrooms to the pan with leftover garlic oil. Stir around to coat the mushrooms with garlic oil and add a splash of water to the pan. Cover the pan immediately to avoid splatters and let the mushrooms steam.
This method steams the mushrooms so that they can brown at a faster rate. The mushrooms won’t soak in more oil than needed as well.
Check to see if mushrooms are steamed and remove the lid. Let excess water, if any, evaporate. Toss the mushrooms until they start to brown.
Lower the heat to medium and add bay leaves + red chili flakes. Toss to distribute flavor.
At this point, you may need to add more garlic oil for more even cooking.
Add half of your chopped red onion and cook until translucent-looking.
Add grated ginger and garlic. Cook until garlic turns a light brown color.
Prepare your cast iron serving platter, if using, by placing it on high heat on another burner.
Continue to stir for even cooking and deglaze the pan by adding calamansi juice and soy sauce. Scrape up any bits of mushrooms that may have stuck to the bottom of the pan.
Cut the heat and add mayonnaise. Stir around until all ingredients in the pan are coated thoroughly.
Season with salt and freshly cracked black pepper to taste.
Serve on a sizzling platter while hot.
Top with remaining red onions, scallions, and fried minced garlic.
Resources
Culinary Coaching
Want to continue your cooking journey? I’m currently looking for beta testers for a 1:1 culinary coaching program. This program will be centered around fundamental culinary techniques, kitchen confidence, and intuitive home cooking. If you or someone you know may be interested in learning more, I’d love to hear from you!
Food Writing
Tikim by Doreen Fernandez | Popularly known as the Filipino food bible, Tikim is a collection of essays on food and culture written by food critic and scholar, Doreen Fernandez. More about Doreen and her work here.
If you’d like to get a taste of Doreen’s writing, you can jump into Culture Ingested: On the Indigenization of Phillipine Food.
The Governor-General’s Kitchen: Philippine Culinary Vignettes and Period Recipes (1521-1935) by Felice Prudente Sta. Maria | This book gathers interesting and little-known stories from historical sources about the Philippines’ culinary culture from 1521 to 1935. From efforts to stem hunger in a pioneering Spanish colony to early lumpia, this is a must-have for those wanting a deep dive.
Savor the Word: 10 Years of the Doreen Fernandez Food Writing Award | Savor the Word is a beautiful compilation of over 55 winning entries of the Doreen Gamboa Fernandez Food Writing Award, established in 2002. Every story and recipe in this book portrays what Filipino food is all about.
Cookbooks
*Adobo Road Cookbook by Marvin Galputos | Chef Marvin Gapultos demonstrates that delicious Filipino food can be prepared anywhere--from Manila to Los Angeles and everywhere in between. Fun fact: I prepared my first adobo using this book.
*I Am A Filipino by Miguel Trinidad and Nicole Ponseca | Popular chef and restauranteurs, Miguel and Nicole, are known for their restaurants, Jeepney and Maharlika, in New York. They wrote a cookbook that highlights the many flavors of the Philippines and their book also defines basic Filipino cooking techniques.
Podcasts
Exploring Filipino Kitchens by Nastasha Alli | Exploring Filipino Kitchens is a podcast about Filipino food culture, traditions, and history. Each episode, host Nastasha Alli chats with food lovers across the world to ask: what does your Filipino kitchen look like?
Book Shops
Filipino Food Crawl, Online - Please tell my friend, Raf, that I sent you! He just added new books to his site.
Mentioned throughout the class:
Diaspora Co. - A BIPOC-led, Bay Area business that’s decolonizing the spice trade by actually caring about farmers in India + sharing and deepening relationships and stories + providing some of the best, aromatic spices available? Yes, please.
Filipino Food Movement & Filipino Food Movement AU - So many dishes and stories are shared on these Instagram pages. Keep up with what’s happening by giving them a follow.
Hedley and Bennett - Liked my apron and on the hunt to get one? Here’s the one I wore during class.
Tools:
*Microplane - Also known as a rasp. Use to grate parmesan, zest citrus, shave chocolate.
*Bench Scraper - Scoop up mise en place, clean your work surface, cut dough.
Wusthof Knives - These are the knives I have and use on a daily basis.
Global Knives - These are the knives I’m looking to get next. They’re lighter in weight compared to Wusthof.
Nacional Bladeworks - Knives from the Philippines?! Yes, I’m saving my money for one of these babies.
*10-inch Cast-iron Pan - Heavy-duty, hard sear meats, can be placed in an oven.
*All-Clad Pots and Pans - Pots and pans that are versatile and can last a lifetime.
*Fish Spatula - Not only for fish. Does a great job at scraping, scooping, flipping.
*Disclaimer: Some links above are affiliate links. Clicking the links will come at no cost to you but helps creatives like me continue doing the work I do. Thank you!

Kitchen Improv: Roasted Brussel Sprouts
Learning how to cook without measurements can be a daunting feat. In this post, you’ll learn the basics of roasting and gain tools to take it above and beyond!
This is an ode to all the vegetables I neglected eating as a kid. To the broccoli I hid in soiled napkins and the green beans I dismissed during school lunch, I’m sorry. You all deserve so much more recognition.
Recipes aren’t hard and fast rules to be spellbound by. Instead, they’re training wheels to help you further learn your taste and cooking style. Below, you’ll find what-to-do’s and why-to-do-its in the form of guidelines, which can be applied to similar foods of the given example. Although roasting brussels sprouts may be as basic as it seems, I find that these babies always need more love and attention. Whether this post introduces you to a new technique or dish, I do hope this at least encourages you to experiment in your kitchen, cook without a standard recipe, and do so with confidence.
Cooking Guidelines for Roasting Brussels Sprouts
Tools: Baking tray, cutting board, chef’s knife, oven
Ingredients: Brussels sprouts, olive oil or high-temperature, neutral cooking oil, salt, pepper, sour cream, honey, flaky salt
Preheat oven at 400* or higher.
Start at 400* and observe how your vegetables cook. If they’re browning too fast on the outside and they’re still raw on the inside, lower the temperature. This all depends on many factors, which include the density of the vegetables themselves.
Rinse your sprouts and pat them dry with a lint-free towel.
Patting your sprouts dry will help them crisp instead of steam.
Cut off nubby stems ensuring that your leaves stay intact. Peel any tough outer leaves.
Stems are fibrous and turn out chewy after cooking. This is similar to broccoli stems that haven’t been peeled, kale stems, asparagus ends, etc.
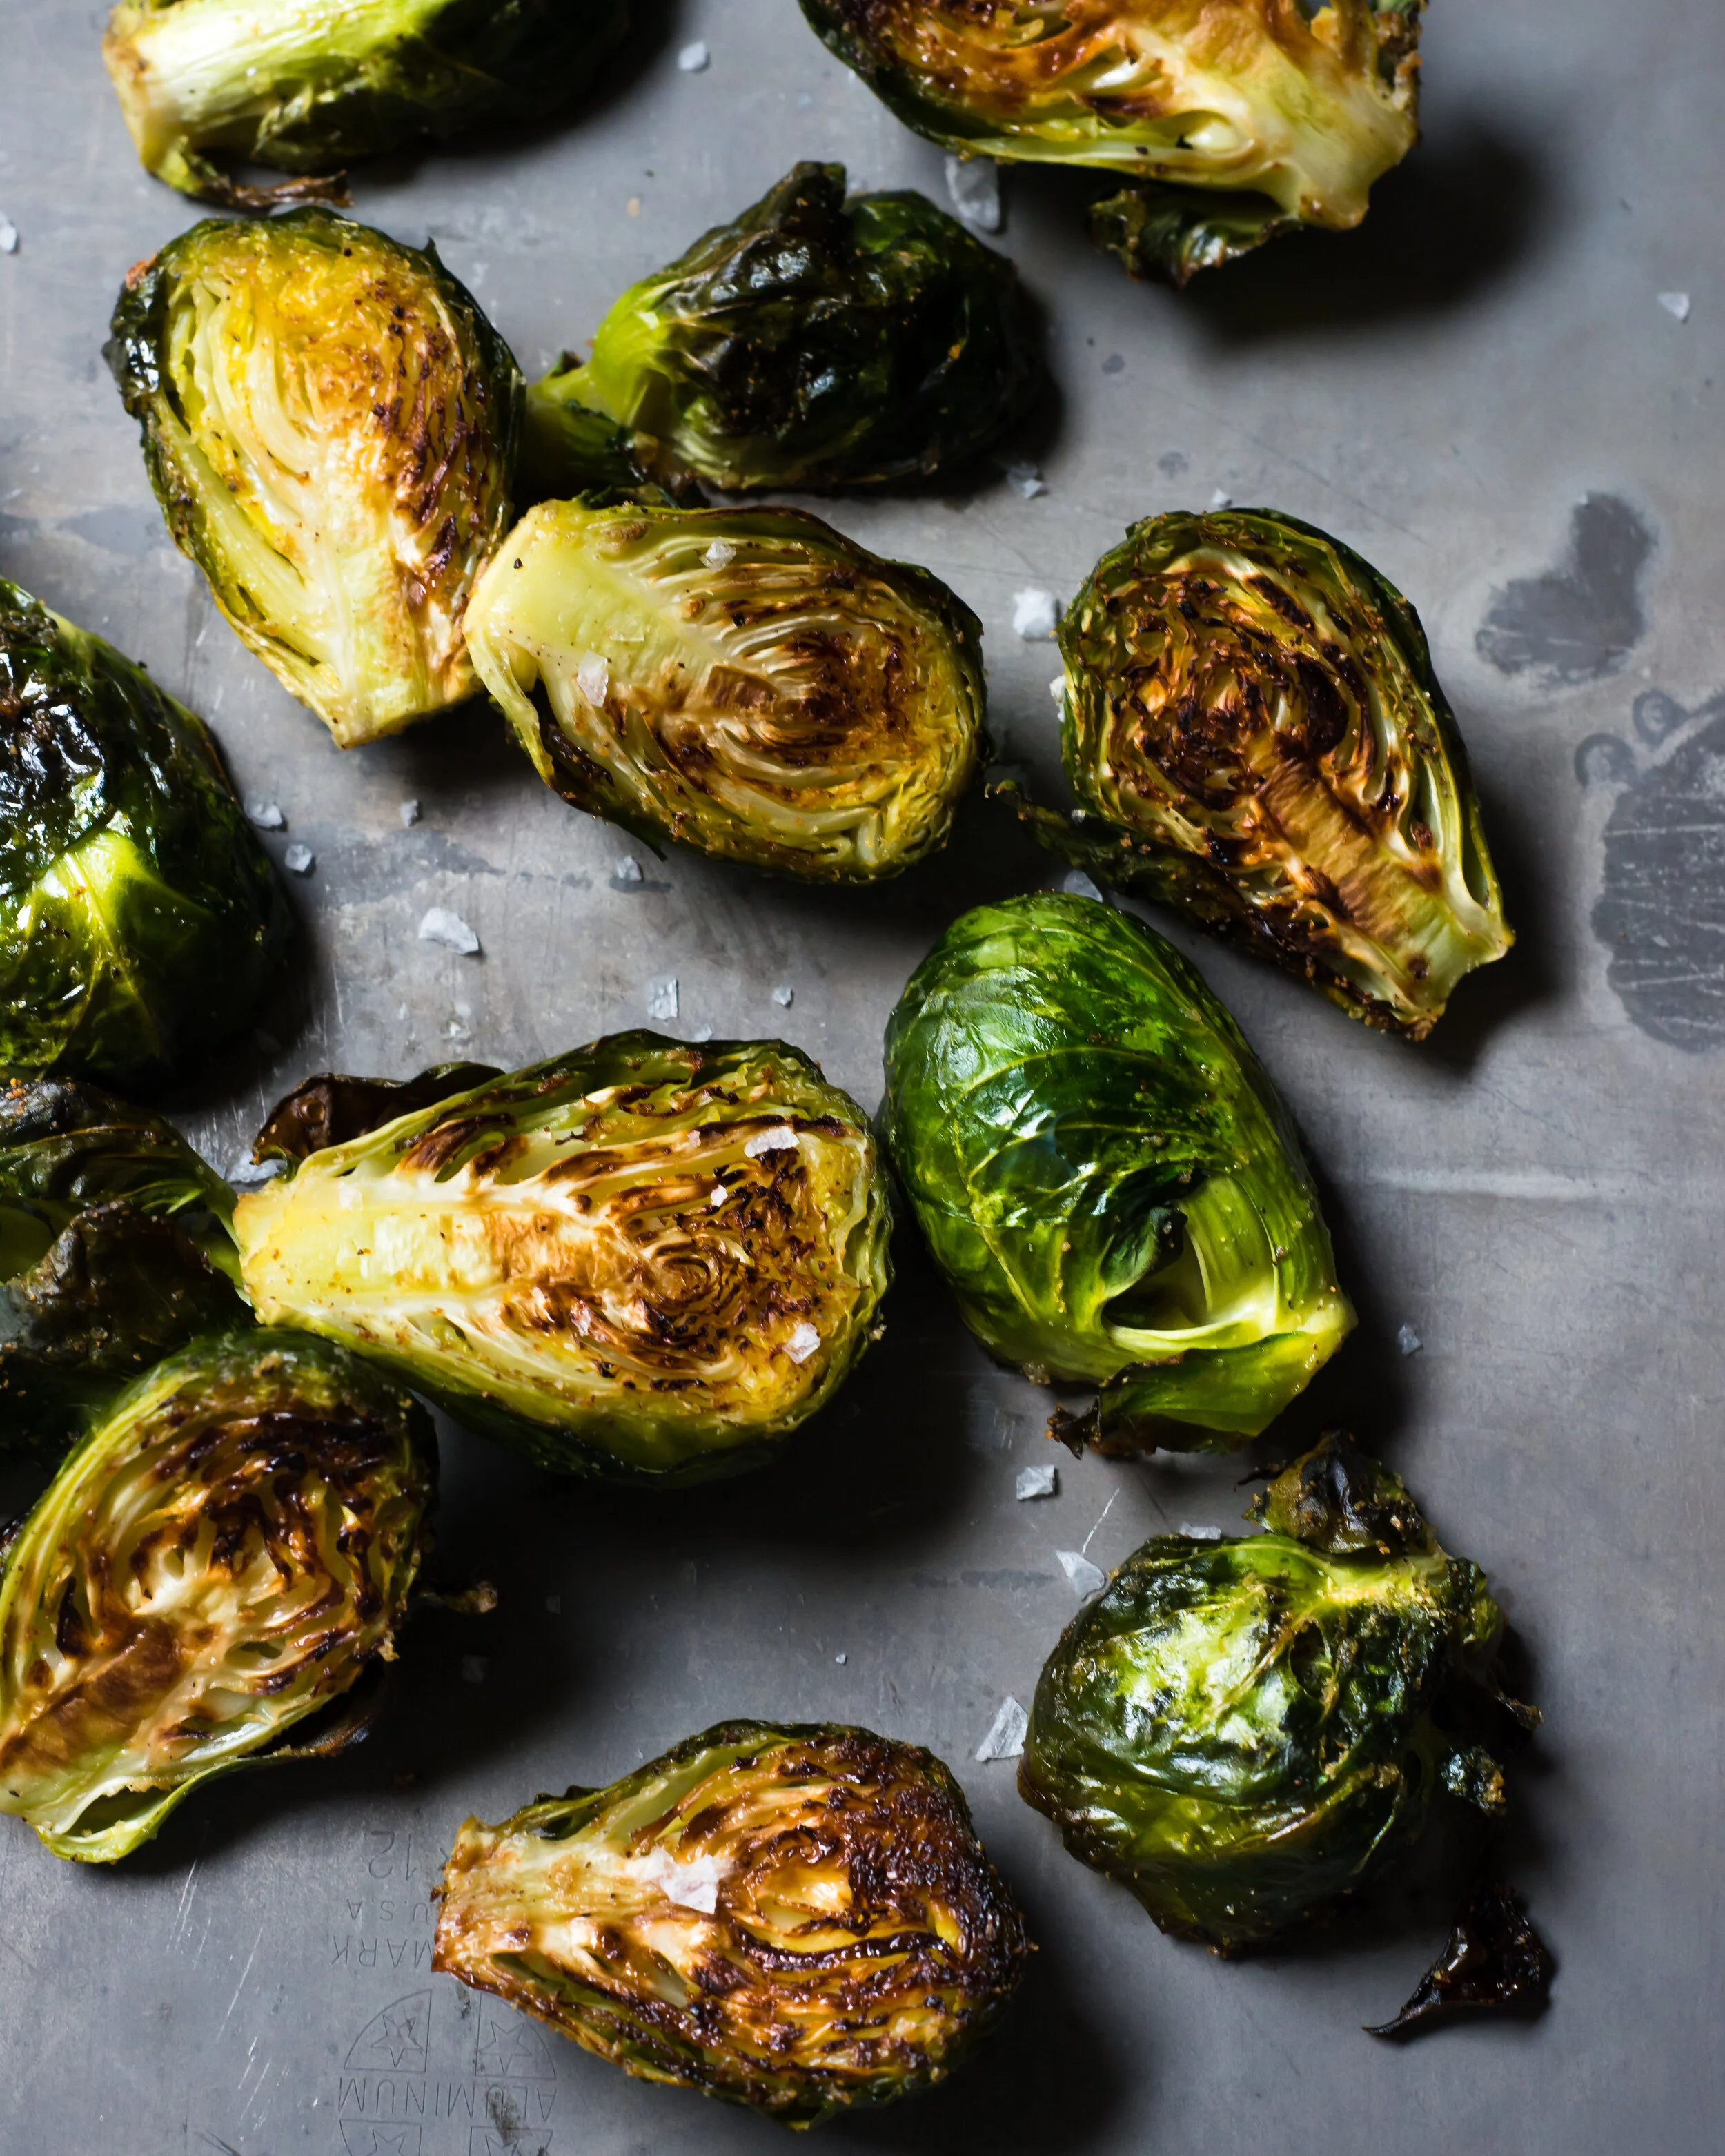
Slice brussels sprouts into even, bite-sized pieces.
I halved mine in the photo above, but you can also cut your sprouts into quarters if they’re more manageable to eat. What’s important is that you cut your brussels sprouts the same size so that they cook at the same rate.
Place brussels sprouts in a single layer on a short-rimmed baking tray.
Short-rimmed baking trays allow food to make direct contact with surrounding oven air. A high-rimmed baking dish, like casserole dishes, will trap water released from the food and steam your vegetables instead.
Placing your food in a single layer mitigates steaming too. Overcrowding the tray with food on top or nearly on top of one another will turn your food mushy and will make it difficult to brown. (hint: if you’re on a crowded subway, how much space do you want between you and someone else?)
Douse your vegetables in enough olive oil to coat. Season with salt, pepper, and spices of your choosing. Toss it all together.
Olive oil imparts flavor, allows seasoning to stick, and helps food crisp evenly. A high-temperature neutral oil, like vegetable oil, works great here too.
Brussels sprouts all have their unique shapes and sizes meaning exact seasoning measurements don’t matter. Sprinkle seasonings across your sprouts and use your hands to toss.
Toss and taste your sprouts for seasoning.
Eat a couple to see if they’re properly seasoned to your taste. If not, adjust as you go! As you’re learning, start with a light hand and keep building until you reach a point where your taste buds dance.
Turn brussels sprouts cut sides down and place the tray in the oven.
Having the cut sides down means maximum caramelization, the process when sugars from vegetables oxidize. The sprouts’ larger surface area will help browning, a.k.a. when flavors become sweet, nutty, and savory.
Place your tray in the middle rack, where it can get an even distribution of heat. Place your tray closer to the bottom if you have an older oven that needs more heat.
This is a good time to check for over hot spots. If over time you’ve noticed food in your oven baking at different speeds, rotate your tray in the middle of the roasting.
Roast and remove when they’re done.
It’s more reliable to look for doneness rather than having oven time. Every oven is different, and all sprouts weren’t grown the same! Key indicators for doneness look like even browning, taste like nuttiness and sweetness, and feel like your vegetables are soft yet retain bite (not mushy nor raw and crunchy).
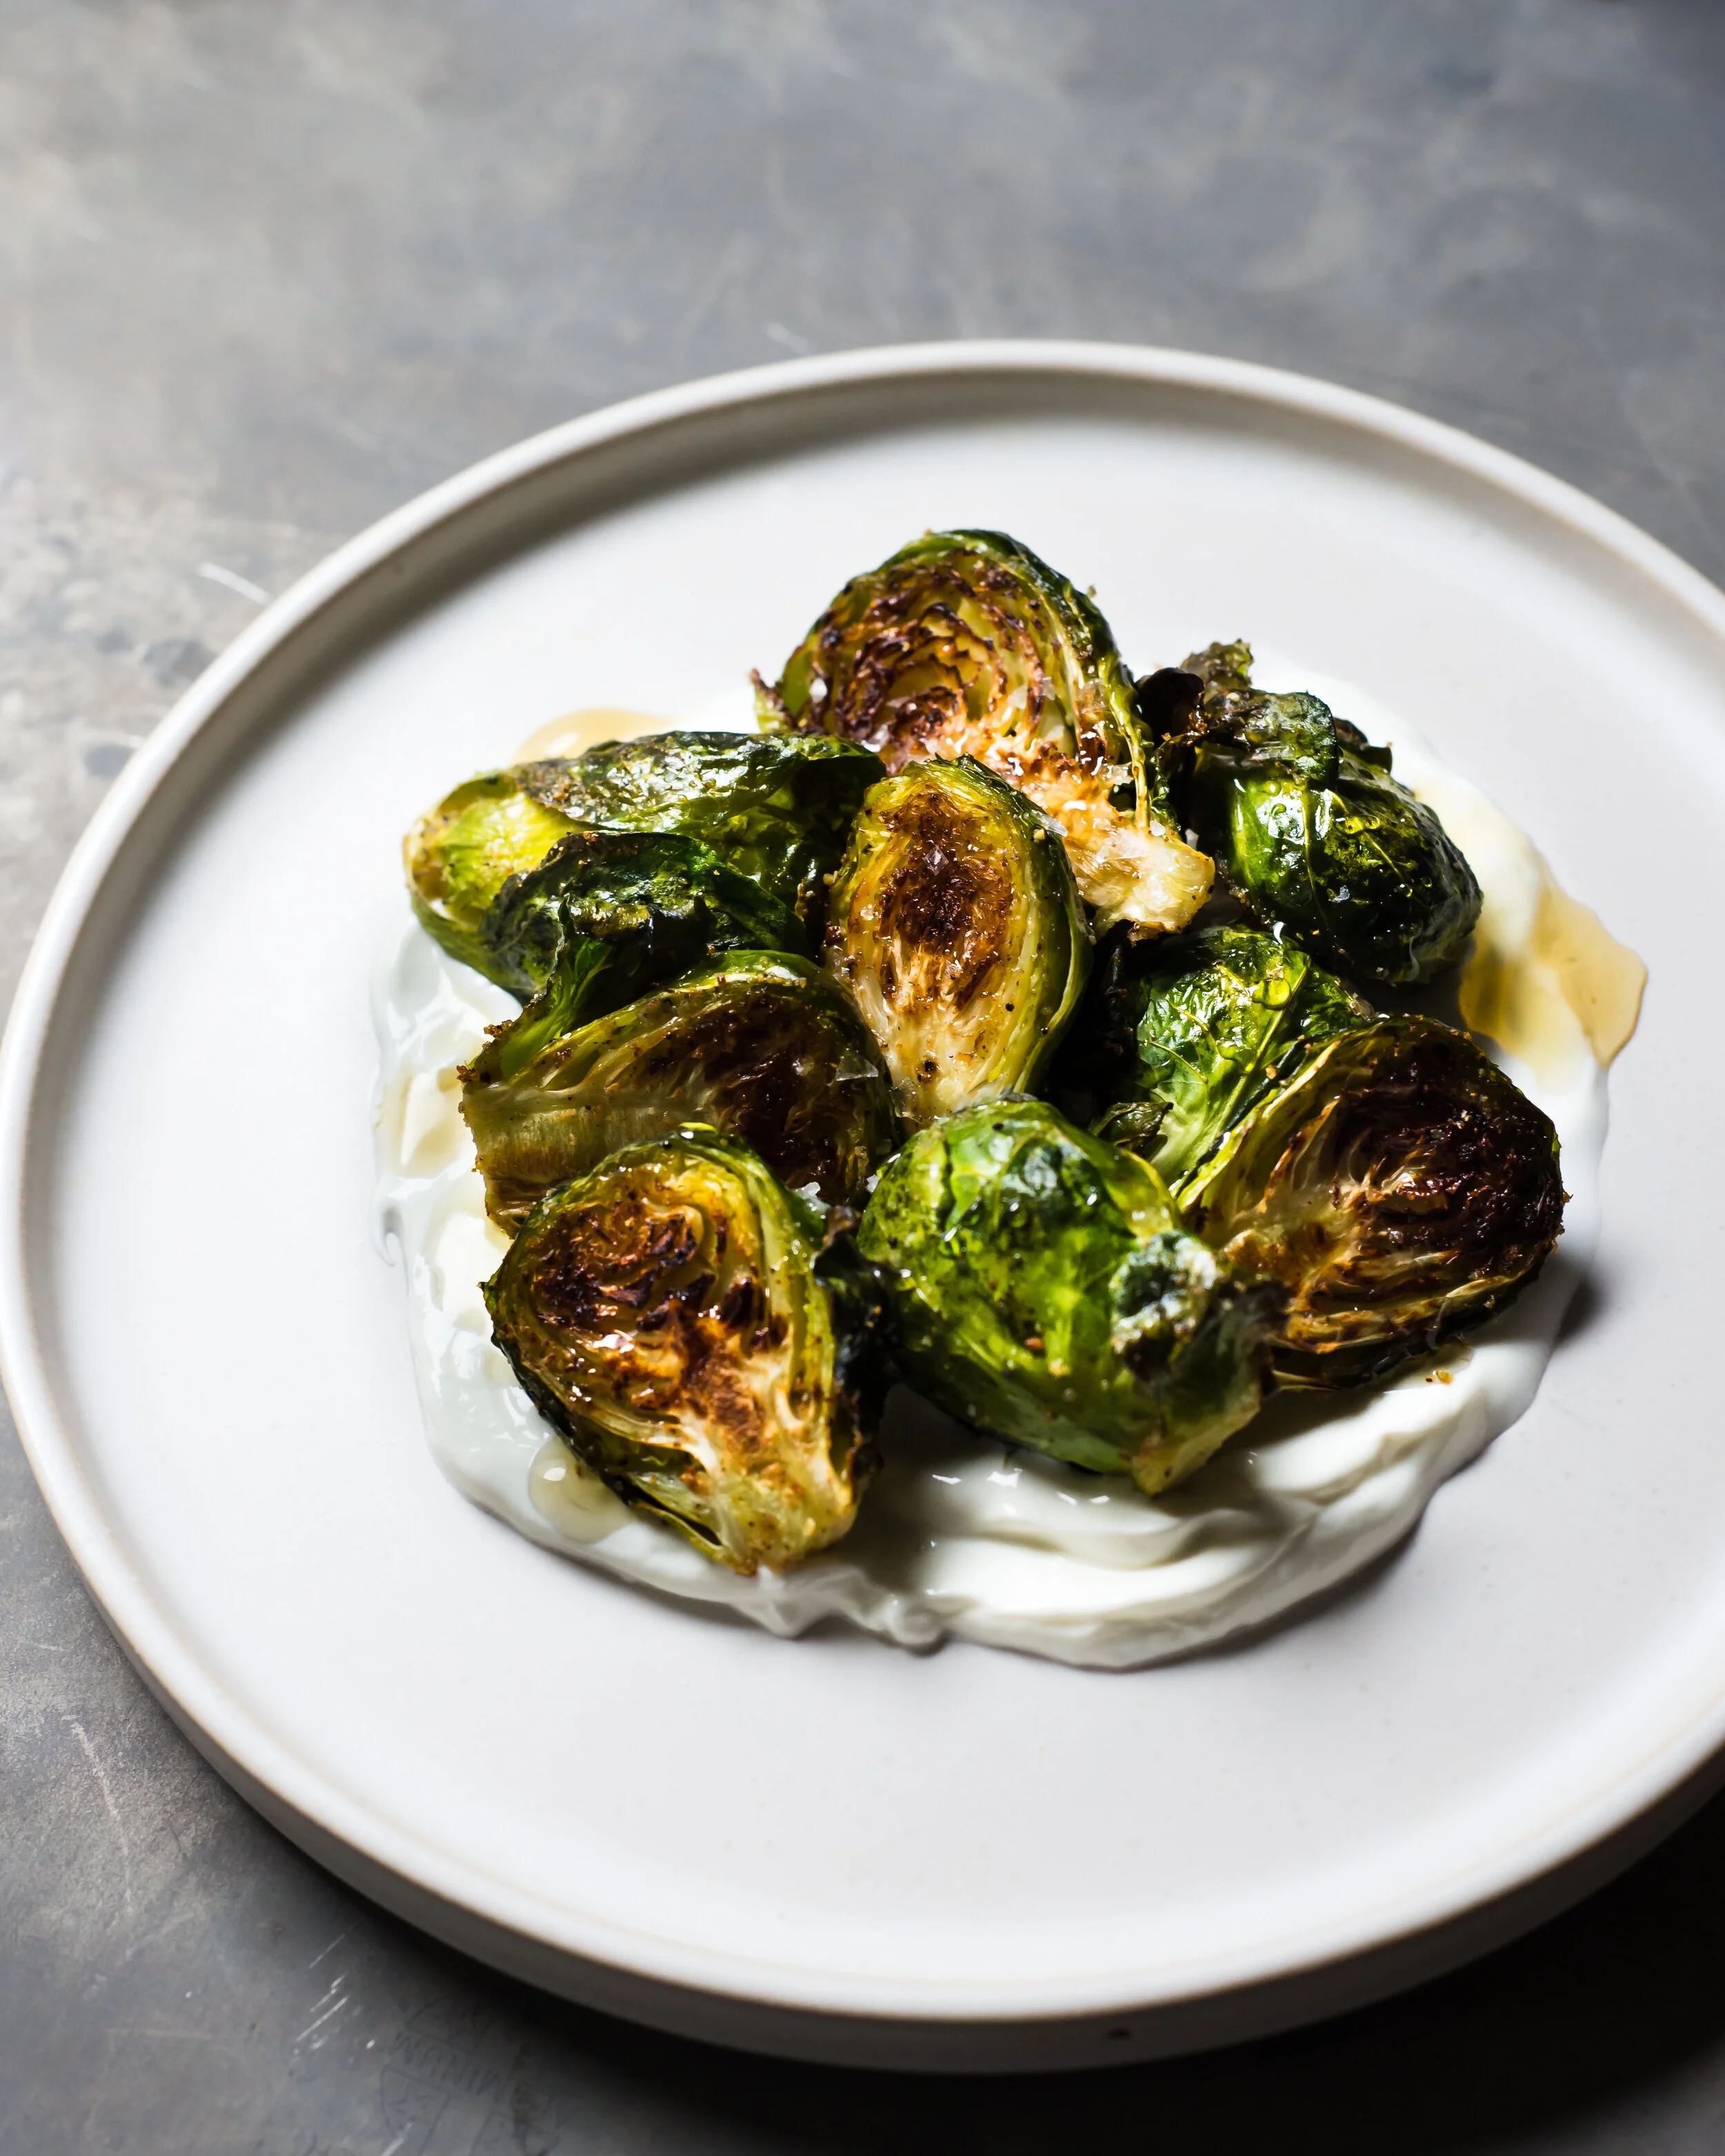
Lay down sour cream on a plate and top with brussels sprouts.
Flavor is composed of aroma, looks, and taste. Keeping this in mind, I smeared some fat down, in the form of sour cream, to help with texture and overall looks of the dish. This sour cream also adds tanginess and acidity to further break down the starchiness of the brussels sprouts.
Drizzle honey and add flaky salt.
Honey amplifies the sweetness that the browning brought out in the naturally bitter vegetable. The flaky salt also adds a nice crunch, which I absolutely love.
Cooking Improvisation
Now that you have the basics of roasting brussels sprouts down, you can replicate these techniques with other hearty vegetables! When creating your own dishes, think about texture, balance, look, smell, and feel.
Take a vegetable + coat in fat and seasoning + heat at 425 or higher = Roasted vegetables
You can add and switch up many of the elements you see in the formula above. Think about the vegetable’s natural taste and start complementing and contrasting it with additional ingredients. Some examples of things to get your mind churning below:
Love crunch? Add toasted nuts or even make it mix of crushed nuts and spices.
Out of honey? Agave, maple syrup, or even a silky vinaigrette works here.
Need to make this meaty? Add mushrooms or even cook off bacon and toss the vegetables in its rendered fat
The possibilities are endless once you have the hows and whys of cooking. So rather than being beholden to your measuring spoons for roasting, have fun and use your five senses to cook!